Tuesday, 8 November 2011

The cabinets come rolling in...

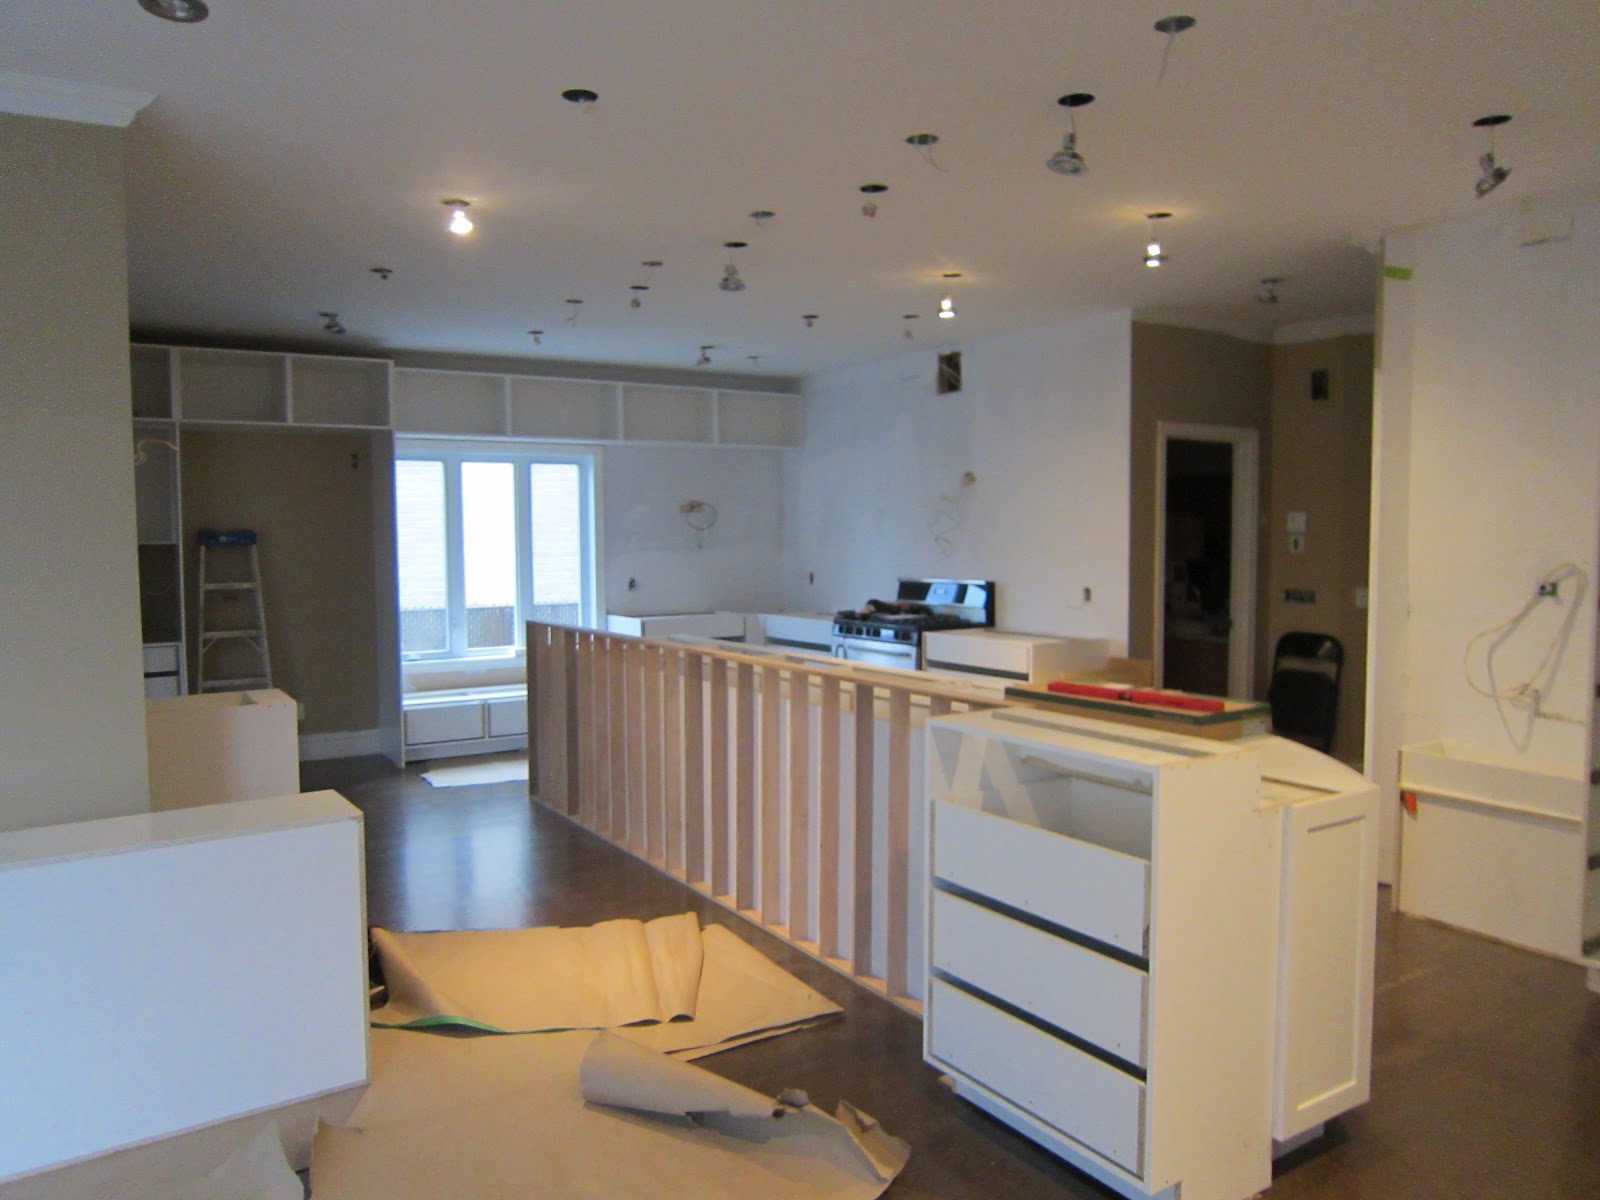
This week the cabinets are being installed.
We still don't have a functioning sink but look at all these cabinets.

This is where the stove will be.  There will be a bench seat under the window.

This used to be our dining room.
Here is the before of the dining room

The cabinets in the center are for the 15 food island.

Here the old stove is in place as well as the surrounding cabinets.
This one shows the island cabinets taking shape.  The cabinets in the great room are all the upper cabinets that will be installed in the next few days.

Here is where the quartz bar will be installed. It will easily seat 6 people.  The space to the left of the window with house our 48" refrigerator.  If you have 4 kids you need this.

The far end of the photo shows the cabinets for surrounding the sink and dishwashers.  That's plural for two dishwashers.  Again, if you have 4 kids you need this.
Remember the before? Can you see it coming together yet?


Monday, 7 November 2011

Wood Floors - Before and After. The nightmare begins.

Do you remember our rustic modern flooring?  The dog loved it, because if he peed on it, no one would notice.

Then came the installation of our new wood floors.  My son is thrilled.  Or he's just excited to play on my phone.
So in order to get the new bare wood floors to match the rest of the house, we needed to leave the house.  So that the sanding, buffing, tinting and varnishing could move along.
So we lapped it up in a nice chalet on a lake.

When we were driving home the contractor called and said "I'm not quite happy with the floors.  I'm going to buff them out and do one more coat of varnish.  Can you stay at the chalet a few more days?"

"What the??"

Anyways...we opted to leave again the following weekend and so that his guys could do the floors again. 
Here are the floors from the first round of finishing..

From far they are shiny and new.


But close up they have sawdust and hair from the varnish rollers stuck into the top coat of varnish.


The week comes to an end and we make our way back to the chalet...
Not to shabby, but after 4 weeks of being in a home that's not yours, you really want to go back to your own home, sleep in your own bed and shower in your own shower.  We get the call from the contractor that it was ok to go back home.

Well he didn't see the floors yet.  He only thought it was safe to go back.

That's some deep uneven sanding...along with some kind of residue left on the varnish.  I don't know the technical term, but it looks like the guys left the sander on and forgot about it.  It gouged the edge of the wood where it meets our bathroom ceramic tiles.  You can also see more sawdust, dirt and hair.

Do these look like brand new, just installed, sanded, buffed and stained floors to you??


NOT

And those recessed wood vents we paid extra for, they don't even fit flush now that the varnish has been slapped on so haphazardly.

On the bright side, this guy is not phased.  As long as the fridge is still stocked.  It's been relocated to the entry room.  To make  way for our floor massacre.


Monday, 31 October 2011

The Chalet Rental...

While the floors are being sanded, buffed, tinted, and varnished we can not enter the house.  For 10 days straight.  We had the entire first level flooring of our house refinished, so that the entire floor would be a continuous solid colour and finish.

So here we are at the chalet rental.  Enjoying fresh air, real flooring, a working kitchen (leading to cooking & baking) and a beautiful view.


It just so happen to be halloween. So we spent halloween in an unfamiliar town and had a surprisingly great time. 

Wednesday, 26 October 2011

Kitchen Renovation - Plastering and new floors

During our renovation, plastering is both exciting and depressing.  It's exciting since walls are up and you can really see things taking shape.  It's depressing because everything in your house is covered in a gritty chalky film.  Gross.

Right after the plaster guys came, the floor guys came, so in addition to chalky dust particles, we got sawdust.  Double gross.

This is looking into the great room.  Our rustic modern plywood is now being cover up with beautiful oak floors.   Wait to you see what really happens to them.

Here you can finally see the space we have to work with.  Do you remember how butchered the ceiling was.  Well plaster fixed it right up!
Look at this before photo of the ceiling.

This is where the sink used to be.


Here's looking into the great room from the kitchen.  You can never have to many pot lights.


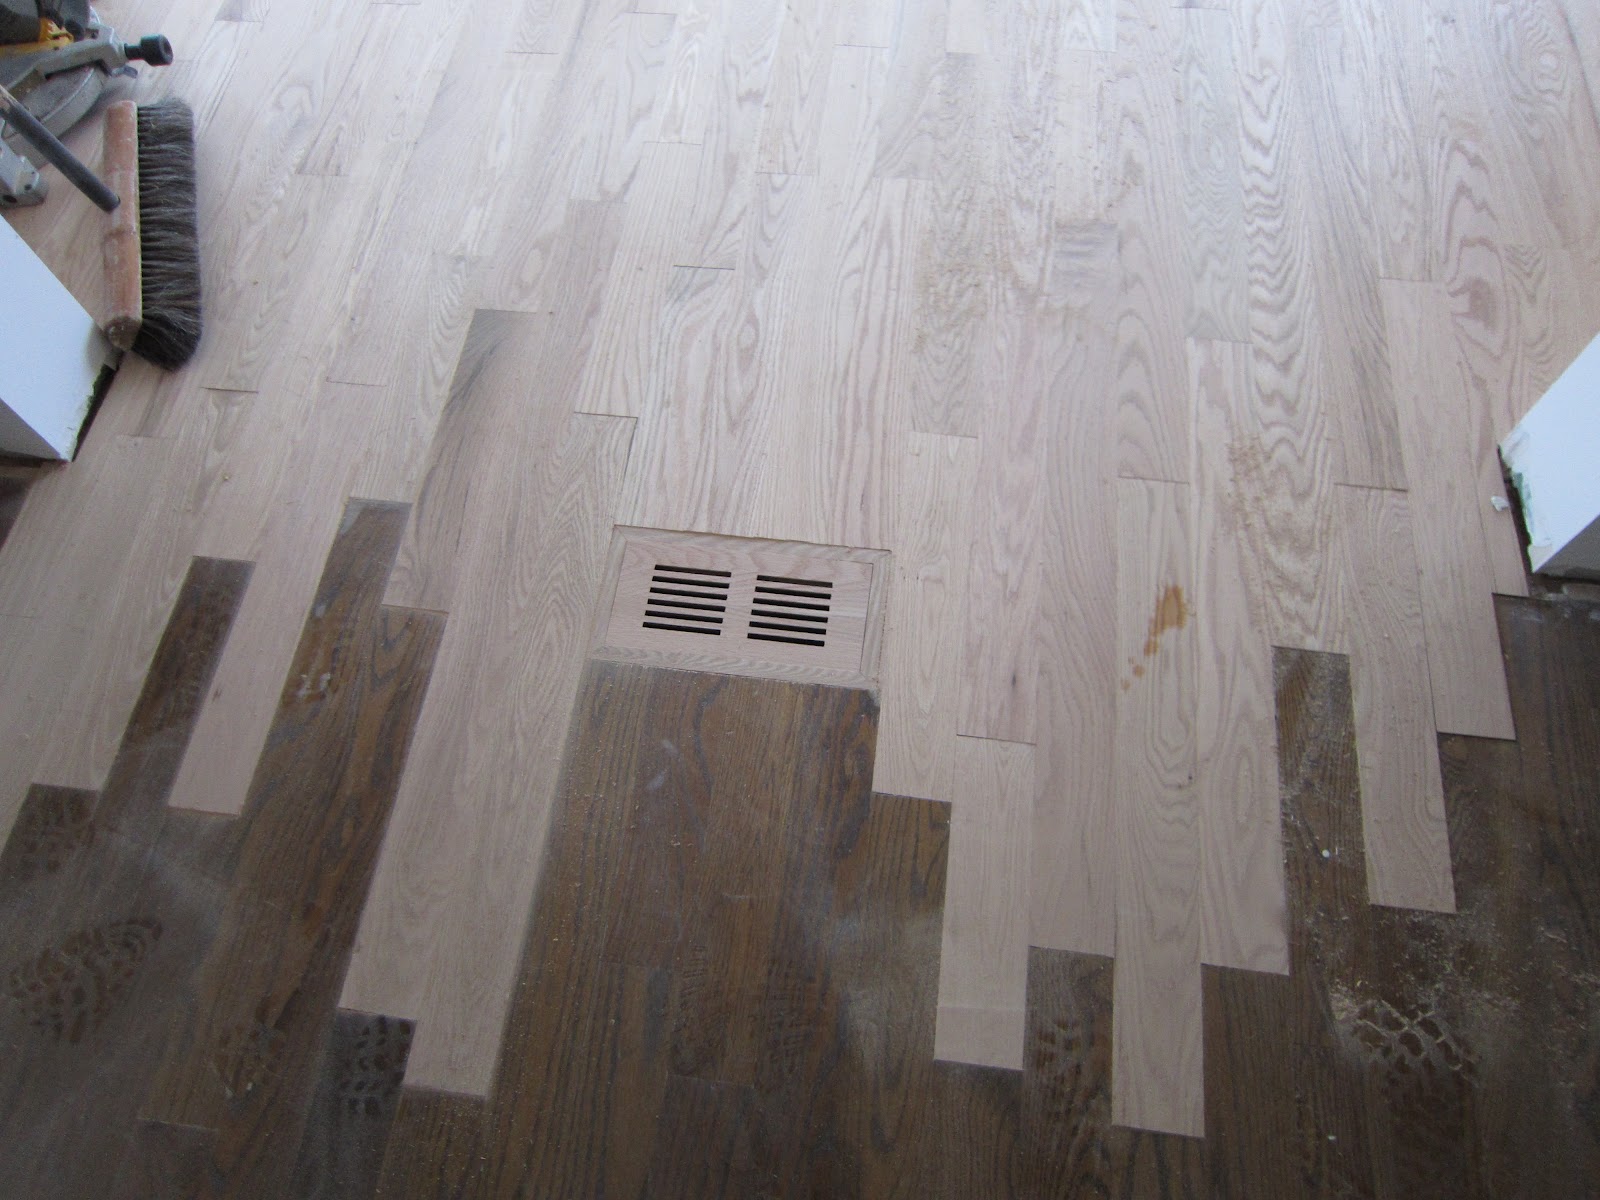
This is an upgrade we decided on.  Recessed air vents.  It is pretty nice.  The dark wood is the old floor, meeting up with the new wood planks.

Wednesday, 12 October 2011

Kitchen Renovation: During photos. Electrical & Plumbing

Living during a renovation is messy and stressful.  Do you really need me to explain.  This is only week 2.

This week is electrical week.  The entire kitchen was rewired for all new lighting and appliances.

Here is what is left of my sink and not so beloved dishwasher.  Yes it did the dishes,  but he was noisy and he used to wet the floor a few times.  
Our gas stove has been repositioned into it's new location. 
That is the water line and drain for the upcoming island sink.  It's a good thing I left the blue mat on the floor,  you know so you can wipe your feet clean before you step onto the floors.  
Do you like what we've done with the floors.  I have four kids.  This floor was not fun. Luckily the contractor boarded it up after a few days.

This is it clean.
Looking into the kitchen from the great room .  As you can see the kids are not phased by any of this.    They are even comfortably sitting on the plywood rustic modern floors.


Wednesday, 5 October 2011

Kitchen Demolition Photos

Here are a few photos that were taken during the demolition.  It was a noisy, dusty mess.  It took just one day to demo the kitchen, adjacent room and flooring from the great room (we were renovating those as well).  So begins our 9 week journey.

Here we are, taking the doors off the cabinets.  It requires drinking wine.  Those are tomato sauce jars.  We can our own tomato sauce in the fall.
The fridge has been relocated to it's new resting place for the next 8 weeks.

The fridge will now be halfway between the kitchen and the great room.


Cabinets are gone and it's about to get really ugly.

This is the wall that separated our formal dining room, which we never used, from our kitchen.


With the wall down, we not have a 30 foot span to create our new dream kitchen.  Those white abs pipes are an unexpected - plumbing.  These will need to be re-routed so that our upstairs bathroom will receive plumbing.


Do you love the floors?   I call it rustic modern.  Here is a few of our great room looking into the kitchen.


Here is what we are left to work with for the next three weeks.  After that the kitchen sink is gone, we will be moving out for a few weeks and renting a chalet!!

But for now, this is still livable.


Saturday, 1 October 2011

Our Kitchen Reno - BEFORE photos

I have four kids and they eat a lot and all the time.  We have a great house in a great neighbourhood, but our kitchen always felt cramped.  So one day my husband and I decided it was time to renovate our kitchen.

When we bought the house we had 1.5 kids.  I was pregnant at the time.  Our kitchen was perfect for a family of that size.  We had the small fridge, one dishwasher, one sink and one oven.   We made some serious changes.  We now have a dream kitchen, no kidding.  Sometimes I see pictures of it and say, wow, that my kitchen?  But first some background...

We already renovated this house twice in the past.  Once to renovate the basement by building a new bedroom and updating the bathroom.  And in 2006, after finding out baby number 4 was on the way. We added an 1,800 square foot addition to the back of the house.  This gave us a nice size great room, an extra bedroom, and a four piece bathroom on the 2nd level.

We started planning our kitchen renovation in March of 2011.  It took a good 7 months from conception before we started demolition and it really paid off.   We decided to demo our kitchen and the adjacent wall  to create one huge 30 feet by 16 feet kitchen.   Here are a few before photos...
Before  - This photo was taken in 2006
 The room you are looking into below is the dinning room.  It will soon be our new kitchen.
Before - Demo has already started. 

Kitchen Before - This is from Demo day

Kitchen Before - This is from Demo day.