Showing posts with label Before Pictures. Show all posts

Wednesday, 25 April 2012

Spilled Nail Polish

This is what happens when your daughter spills nail polish on your brand new table...


It eats up the varnish...

And nothing can neutralize it, except paying the wood maker $500 to refinish it.

Here is the perpetrator.  Perhaps her earmuff-wearing prevented hearing me say,  "Don't use that nail polish on the brown table!"

Here's are some tips.
#1 Don't use nail polish indoors
 #2 Definitely don't wear those earmuff indoors, 'cuz you can't hear me say tip #1.

Wednesday, 30 November 2011

Quartz Countertop & Stainless Counter Top

We have three different work surfaces in our renovated kitchen, quartz, butcher block and stainless steel.  Each chosen for their different purposes.

The butcher block is for the working side of the island.  This surface allows for easy cutting and food prepping.  It's a great surface to roll out cookies and knead bread.

We have stainless steel for the counters flanking the Viking Range.  This is great if you have a hot pot and need to lay it down quickly.  It scratches easily but does well against heat and it's stain resistant.  It's for all the tough, messy, greasy, cooking that come from the stove top.

They have been installed, but we won't remove the sticky film until all the backslashes have been removed.


For the bar seating and other countertops, we chose the Ceasarstone quartz, because it's clean and pretty and looks freaking amazing as a bar.  It spans 15 feet across and is flanked to the floor on both sides.


The bar is a few inches above the butcher block.  This separates the work from the play area, and you don't see any of the butcher block mess from the dining room and great room.  People seated at the bar also get a great view of cooking without getting dirty.


Wednesday, 26 October 2011

Kitchen Renovation - Plastering and new floors

During our renovation, plastering is both exciting and depressing.  It's exciting since walls are up and you can really see things taking shape.  It's depressing because everything in your house is covered in a gritty chalky film.  Gross.

Right after the plaster guys came, the floor guys came, so in addition to chalky dust particles, we got sawdust.  Double gross.

This is looking into the great room.  Our rustic modern plywood is now being cover up with beautiful oak floors.   Wait to you see what really happens to them.

Here you can finally see the space we have to work with.  Do you remember how butchered the ceiling was.  Well plaster fixed it right up!
Look at this before photo of the ceiling.

This is where the sink used to be.


Here's looking into the great room from the kitchen.  You can never have to many pot lights.


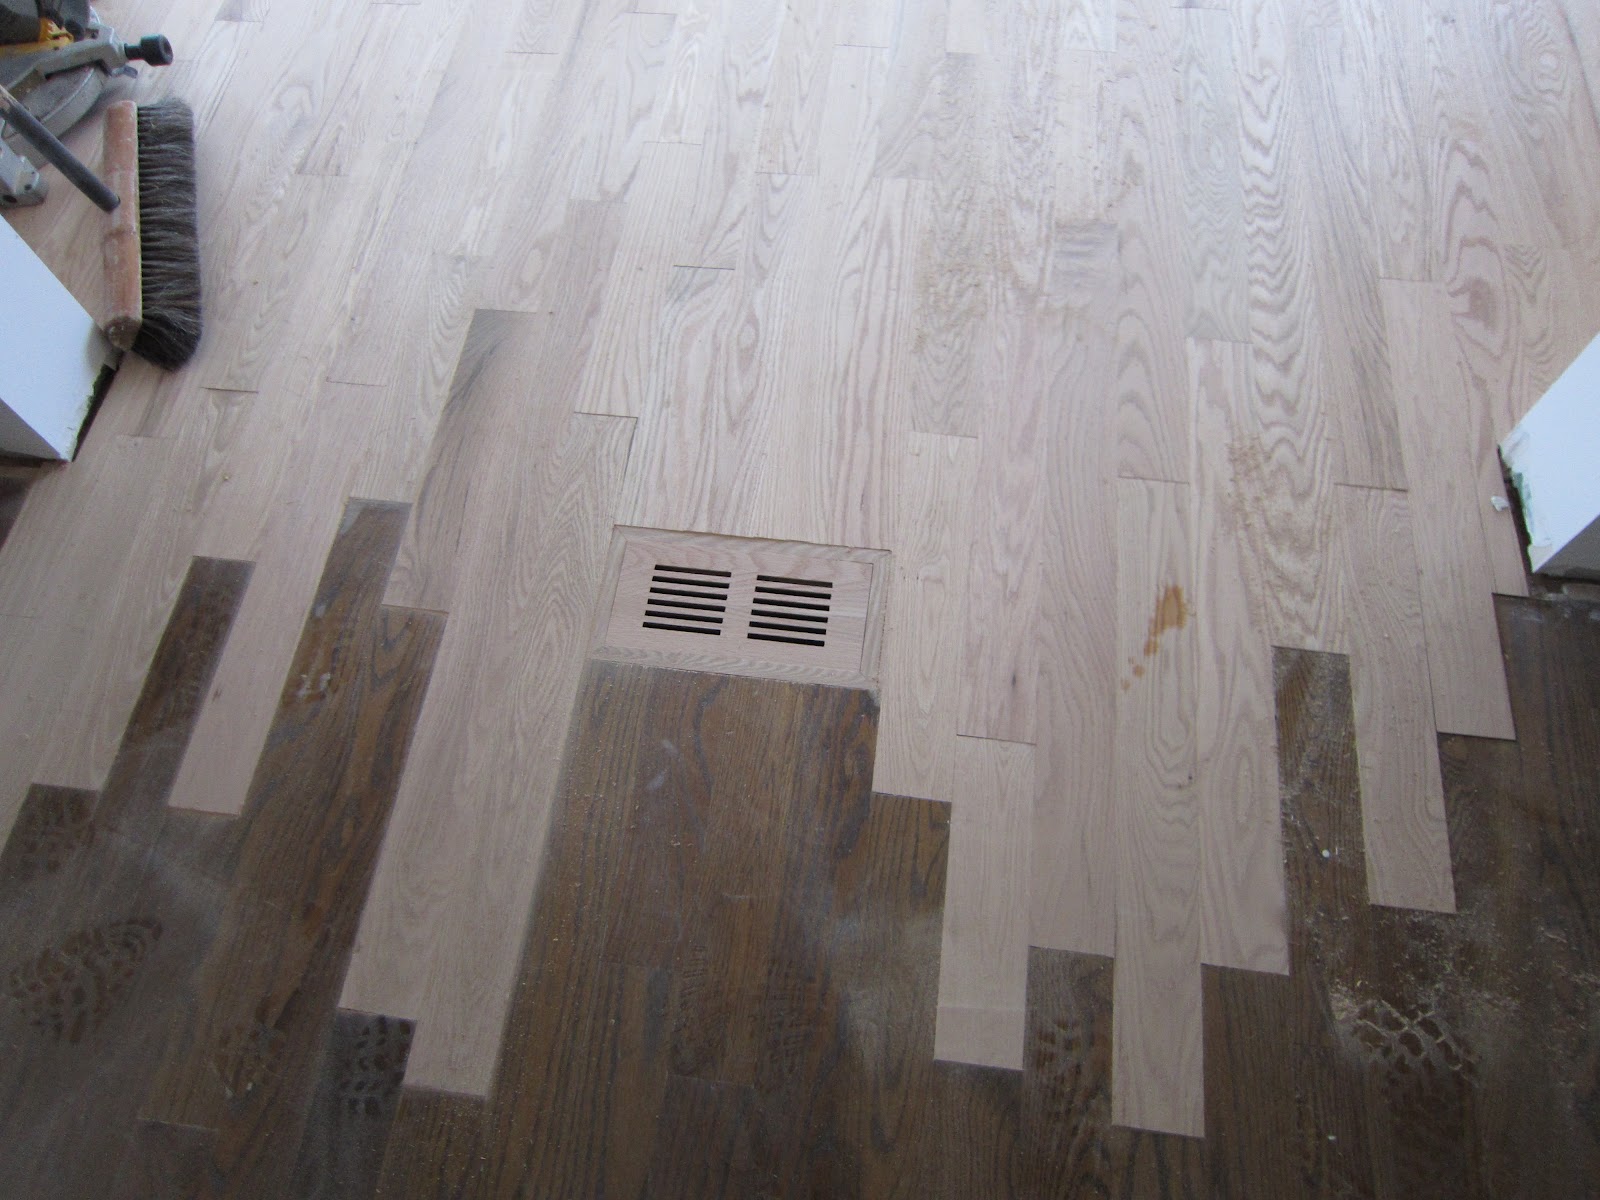
This is an upgrade we decided on.  Recessed air vents.  It is pretty nice.  The dark wood is the old floor, meeting up with the new wood planks.

Wednesday, 12 October 2011

Kitchen Renovation: During photos. Electrical & Plumbing

Living during a renovation is messy and stressful.  Do you really need me to explain.  This is only week 2.

This week is electrical week.  The entire kitchen was rewired for all new lighting and appliances.

Here is what is left of my sink and not so beloved dishwasher.  Yes it did the dishes,  but he was noisy and he used to wet the floor a few times.  
Our gas stove has been repositioned into it's new location. 
That is the water line and drain for the upcoming island sink.  It's a good thing I left the blue mat on the floor,  you know so you can wipe your feet clean before you step onto the floors.  
Do you like what we've done with the floors.  I have four kids.  This floor was not fun. Luckily the contractor boarded it up after a few days.

This is it clean.
Looking into the kitchen from the great room .  As you can see the kids are not phased by any of this.    They are even comfortably sitting on the plywood rustic modern floors.


Wednesday, 5 October 2011

Kitchen Demolition Photos

Here are a few photos that were taken during the demolition.  It was a noisy, dusty mess.  It took just one day to demo the kitchen, adjacent room and flooring from the great room (we were renovating those as well).  So begins our 9 week journey.

Here we are, taking the doors off the cabinets.  It requires drinking wine.  Those are tomato sauce jars.  We can our own tomato sauce in the fall.
The fridge has been relocated to it's new resting place for the next 8 weeks.

The fridge will now be halfway between the kitchen and the great room.


Cabinets are gone and it's about to get really ugly.

This is the wall that separated our formal dining room, which we never used, from our kitchen.


With the wall down, we not have a 30 foot span to create our new dream kitchen.  Those white abs pipes are an unexpected - plumbing.  These will need to be re-routed so that our upstairs bathroom will receive plumbing.


Do you love the floors?   I call it rustic modern.  Here is a few of our great room looking into the kitchen.


Here is what we are left to work with for the next three weeks.  After that the kitchen sink is gone, we will be moving out for a few weeks and renting a chalet!!

But for now, this is still livable.


Saturday, 1 October 2011

Our Kitchen Reno - BEFORE photos

I have four kids and they eat a lot and all the time.  We have a great house in a great neighbourhood, but our kitchen always felt cramped.  So one day my husband and I decided it was time to renovate our kitchen.

When we bought the house we had 1.5 kids.  I was pregnant at the time.  Our kitchen was perfect for a family of that size.  We had the small fridge, one dishwasher, one sink and one oven.   We made some serious changes.  We now have a dream kitchen, no kidding.  Sometimes I see pictures of it and say, wow, that my kitchen?  But first some background...

We already renovated this house twice in the past.  Once to renovate the basement by building a new bedroom and updating the bathroom.  And in 2006, after finding out baby number 4 was on the way. We added an 1,800 square foot addition to the back of the house.  This gave us a nice size great room, an extra bedroom, and a four piece bathroom on the 2nd level.

We started planning our kitchen renovation in March of 2011.  It took a good 7 months from conception before we started demolition and it really paid off.   We decided to demo our kitchen and the adjacent wall  to create one huge 30 feet by 16 feet kitchen.   Here are a few before photos...
Before  - This photo was taken in 2006
 The room you are looking into below is the dinning room.  It will soon be our new kitchen.
Before - Demo has already started. 

Kitchen Before - This is from Demo day

Kitchen Before - This is from Demo day.

Showing posts with label Before Pictures. Show all posts

Wednesday, 25 April 2012

Spilled Nail Polish

This is what happens when your daughter spills nail polish on your brand new table...


It eats up the varnish...

And nothing can neutralize it, except paying the wood maker $500 to refinish it.

Here is the perpetrator.  Perhaps her earmuff-wearing prevented hearing me say,  "Don't use that nail polish on the brown table!"

Here's are some tips.
#1 Don't use nail polish indoors
 #2 Definitely don't wear those earmuff indoors, 'cuz you can't hear me say tip #1.

Wednesday, 30 November 2011

Quartz Countertop & Stainless Counter Top

We have three different work surfaces in our renovated kitchen, quartz, butcher block and stainless steel.  Each chosen for their different purposes.

The butcher block is for the working side of the island.  This surface allows for easy cutting and food prepping.  It's a great surface to roll out cookies and knead bread.

We have stainless steel for the counters flanking the Viking Range.  This is great if you have a hot pot and need to lay it down quickly.  It scratches easily but does well against heat and it's stain resistant.  It's for all the tough, messy, greasy, cooking that come from the stove top.

They have been installed, but we won't remove the sticky film until all the backslashes have been removed.


For the bar seating and other countertops, we chose the Ceasarstone quartz, because it's clean and pretty and looks freaking amazing as a bar.  It spans 15 feet across and is flanked to the floor on both sides.


The bar is a few inches above the butcher block.  This separates the work from the play area, and you don't see any of the butcher block mess from the dining room and great room.  People seated at the bar also get a great view of cooking without getting dirty.


Wednesday, 26 October 2011

Kitchen Renovation - Plastering and new floors

During our renovation, plastering is both exciting and depressing.  It's exciting since walls are up and you can really see things taking shape.  It's depressing because everything in your house is covered in a gritty chalky film.  Gross.

Right after the plaster guys came, the floor guys came, so in addition to chalky dust particles, we got sawdust.  Double gross.

This is looking into the great room.  Our rustic modern plywood is now being cover up with beautiful oak floors.   Wait to you see what really happens to them.

Here you can finally see the space we have to work with.  Do you remember how butchered the ceiling was.  Well plaster fixed it right up!
Look at this before photo of the ceiling.

This is where the sink used to be.


Here's looking into the great room from the kitchen.  You can never have to many pot lights.


This is an upgrade we decided on.  Recessed air vents.  It is pretty nice.  The dark wood is the old floor, meeting up with the new wood planks.

Wednesday, 12 October 2011

Kitchen Renovation: During photos. Electrical & Plumbing

Living during a renovation is messy and stressful.  Do you really need me to explain.  This is only week 2.

This week is electrical week.  The entire kitchen was rewired for all new lighting and appliances.

Here is what is left of my sink and not so beloved dishwasher.  Yes it did the dishes,  but he was noisy and he used to wet the floor a few times.  
Our gas stove has been repositioned into it's new location. 
That is the water line and drain for the upcoming island sink.  It's a good thing I left the blue mat on the floor,  you know so you can wipe your feet clean before you step onto the floors.  
Do you like what we've done with the floors.  I have four kids.  This floor was not fun. Luckily the contractor boarded it up after a few days.

This is it clean.
Looking into the kitchen from the great room .  As you can see the kids are not phased by any of this.    They are even comfortably sitting on the plywood rustic modern floors.


Wednesday, 5 October 2011

Kitchen Demolition Photos

Here are a few photos that were taken during the demolition.  It was a noisy, dusty mess.  It took just one day to demo the kitchen, adjacent room and flooring from the great room (we were renovating those as well).  So begins our 9 week journey.

Here we are, taking the doors off the cabinets.  It requires drinking wine.  Those are tomato sauce jars.  We can our own tomato sauce in the fall.
The fridge has been relocated to it's new resting place for the next 8 weeks.

The fridge will now be halfway between the kitchen and the great room.


Cabinets are gone and it's about to get really ugly.

This is the wall that separated our formal dining room, which we never used, from our kitchen.


With the wall down, we not have a 30 foot span to create our new dream kitchen.  Those white abs pipes are an unexpected - plumbing.  These will need to be re-routed so that our upstairs bathroom will receive plumbing.


Do you love the floors?   I call it rustic modern.  Here is a few of our great room looking into the kitchen.


Here is what we are left to work with for the next three weeks.  After that the kitchen sink is gone, we will be moving out for a few weeks and renting a chalet!!

But for now, this is still livable.


Saturday, 1 October 2011

Our Kitchen Reno - BEFORE photos

I have four kids and they eat a lot and all the time.  We have a great house in a great neighbourhood, but our kitchen always felt cramped.  So one day my husband and I decided it was time to renovate our kitchen.

When we bought the house we had 1.5 kids.  I was pregnant at the time.  Our kitchen was perfect for a family of that size.  We had the small fridge, one dishwasher, one sink and one oven.   We made some serious changes.  We now have a dream kitchen, no kidding.  Sometimes I see pictures of it and say, wow, that my kitchen?  But first some background...

We already renovated this house twice in the past.  Once to renovate the basement by building a new bedroom and updating the bathroom.  And in 2006, after finding out baby number 4 was on the way. We added an 1,800 square foot addition to the back of the house.  This gave us a nice size great room, an extra bedroom, and a four piece bathroom on the 2nd level.

We started planning our kitchen renovation in March of 2011.  It took a good 7 months from conception before we started demolition and it really paid off.   We decided to demo our kitchen and the adjacent wall  to create one huge 30 feet by 16 feet kitchen.   Here are a few before photos...
Before  - This photo was taken in 2006
 The room you are looking into below is the dinning room.  It will soon be our new kitchen.
Before - Demo has already started. 

Kitchen Before - This is from Demo day

Kitchen Before - This is from Demo day.